As a network or cloud administrator, you have a large amount of critical data to keep track of. In a hybrid cloud environment, this includes on-premise and cloud networks, IP usage, DNS for physical and virtual servers, and much more. Managing your hybrid networks and IP addresses are crucial for the continued operation of the business. Anything you can do to make organizing and digesting this data easier ensures your operations continue. One method to do this is using Infoblox vDiscovery to import your Azure and AWS resource tags.
Both Azure and AWS allow you to assign metadata to your cloud resources in the form of tags. These tags allow you to filter and group your resources according to the categories that you choose. Using Infoblox vDiscovery, you can import these metadata tags into your grid as extensible attributes. These EAs can then be used to create filters and smart folders, allowing you to view your cloud objects in new ways.
The following table shows which cloud resources Infoblox can import tags from and where they can be viewed in the Grid Manager:
| Resource | AWS | Azure | Grid Manager Tab |
| VPC / Vnet | X | X | Data Management -> IPAM,
Cloud -> VPCs |
| Subnet | X | Data Management -> IPAM,
Cloud -> Networks |
|
| Network Interface | X | X | Data Management -> DNS -> Zones
(In the zones used for vDiscovery) |
To illustrate how this feature works and can be used, our example will include a multi-cloud environment, with virtual networks in both AWS and Azure. To facilitate the management of these networks, we’ll divide them into three environments based on their use: Development, Staging, and Production.
First, we’ll create tags for our VPCs in AWS and VNets in Azure.
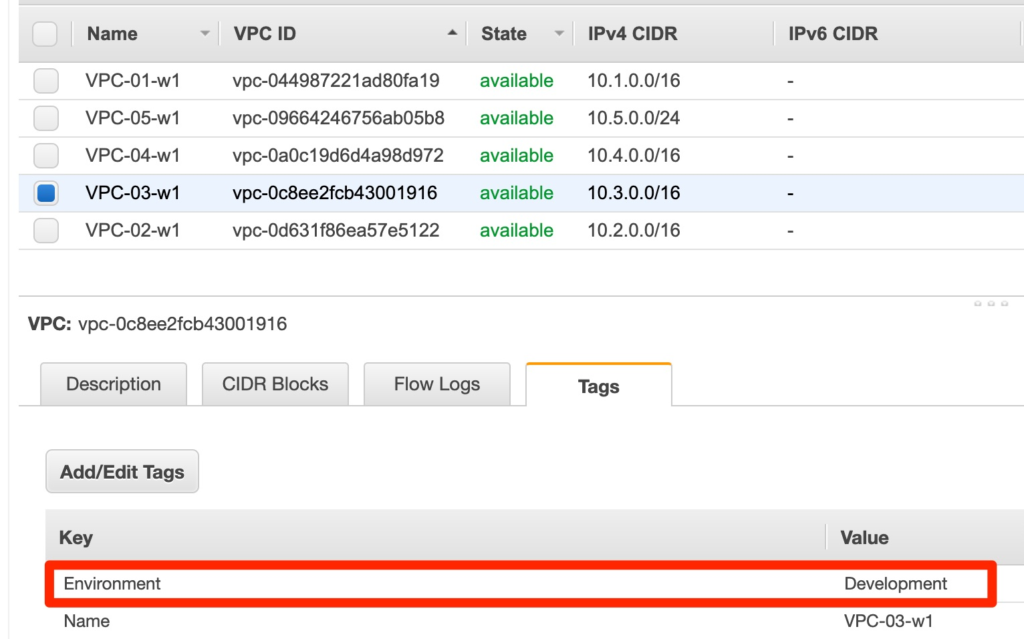
We will use the same Key for these tags on each cloud platform, Environment. The values will be Development, Staging, or Production.

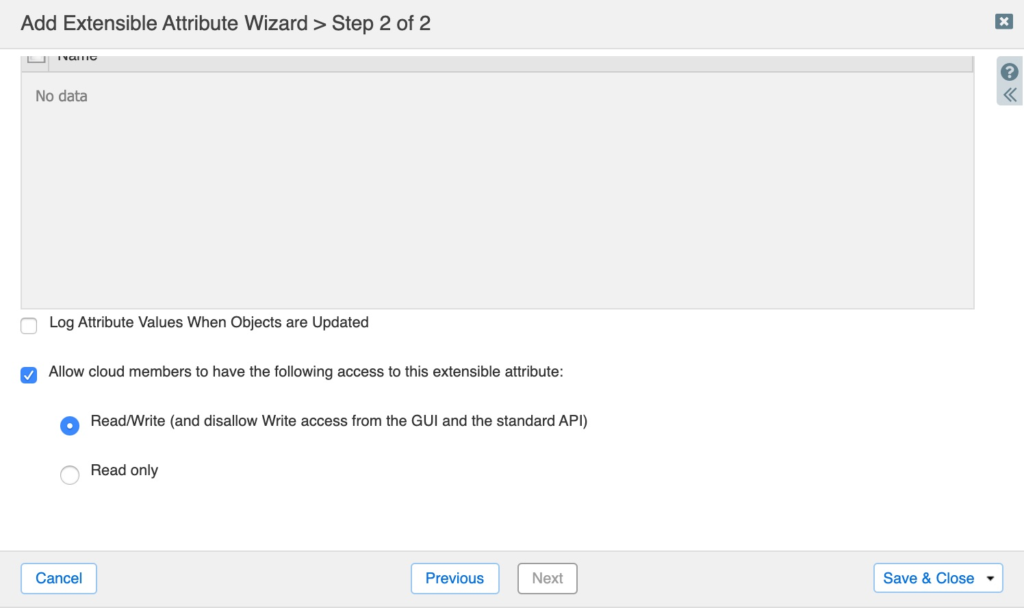
Next, we’ll create an Extensible Attribute in our Infoblox grid to hold these tags when imported. In grid manager, go to the Administration tab, Extensible Attributes tab. Click the + Add button. On Step 1, enter the name Environment, which matches the tag Key in Azure and AWS. Ensure Type is set to String.
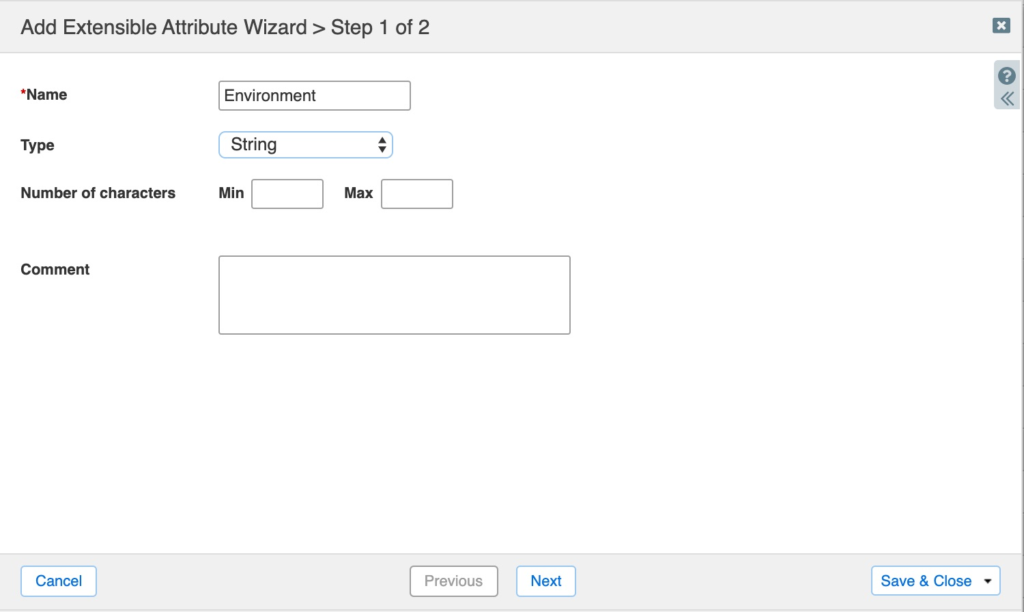
On Step 2, Select the checkbox for “Allow cloud members to have the following access to this extensible attribute:”, Select Read/Write.
Next, run vDiscovery to import data for cloud resources. After running vDiscovery jobs for both AWS and Azure, we can view the tags which were imported.
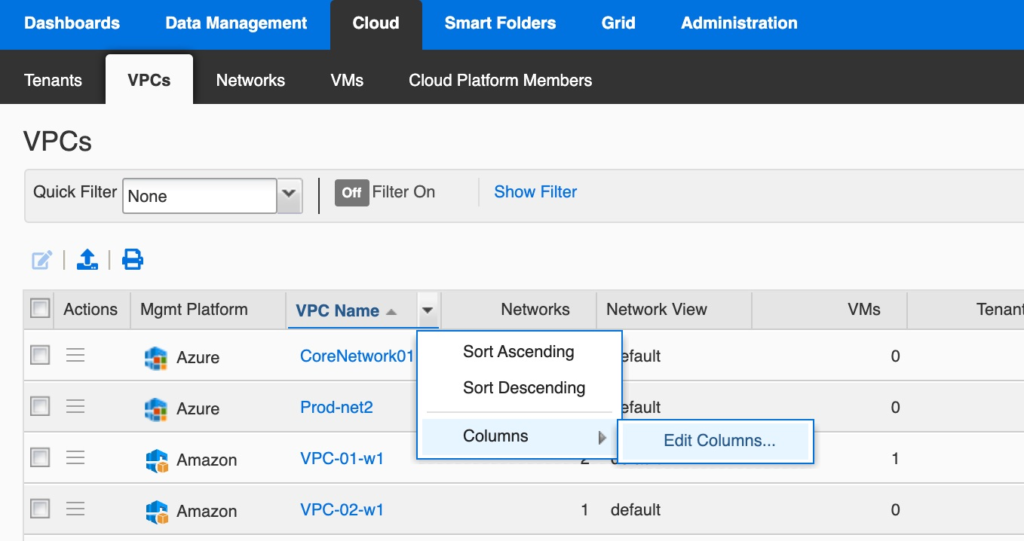
We’ll start on the Cloud tab, VPCs tab. Click the dropdown next to any column name. Expand Columns and click on Edit Columns.
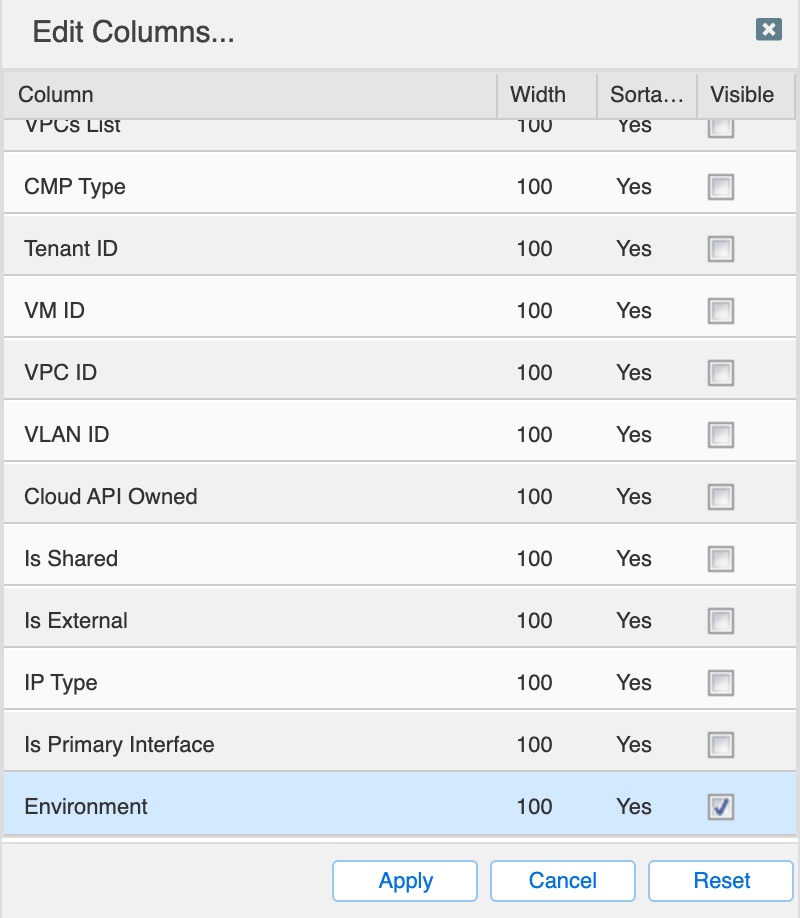
In the Edit Columns window, scroll down to find your new EA and select the checkbox for visible. Click Apply.
Locate the column for your EA. Click and drag the column header to the location where you want it.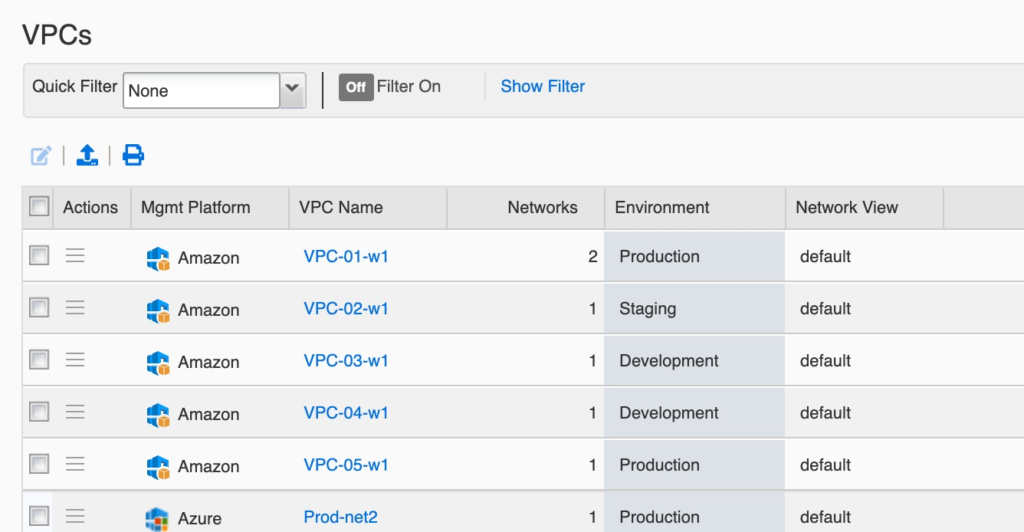
Next, we’ll create filters based on this EA, to facilitate viewing our network environments. Click on Show Filter. In the Choose Filter dropdown, select your EA. For Value, enter the value you want to filter for.

Click Apply, or, Save to make the filter available for later use as well. In the Save Quick Filter window, name the filter and optionally select “Set as a global quick filter” to make it available for all users.

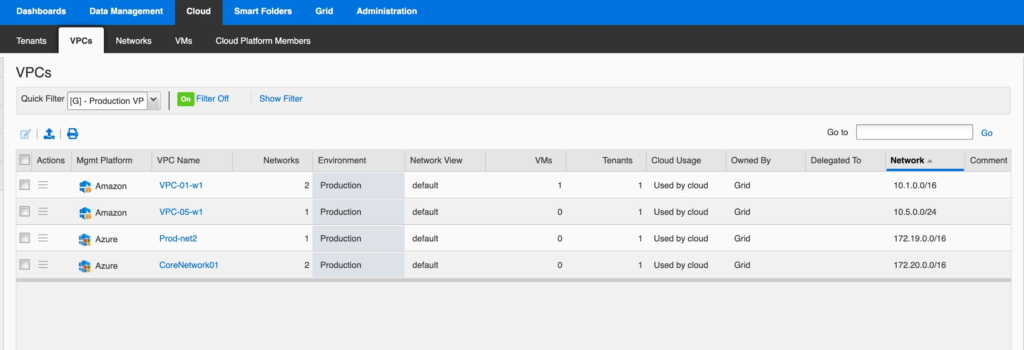
Repeat the same steps to create filters for all values of the EA. After creating filters for all values, you can select these to view your filtered data. For example, the view below shows only Production cloud networks.
In addition to the example above, the following are useful tips when importing Azure and AWS tags as EAs:
- Import tags assigned to Network Interfaces (NIC): When configuring the vDIscovery Job, select the checkbox “For every newly discovered IP address, create:” on the Data Consolidation page. Then select Host or A record type. Set a macro such as ${vm_name}.demo.zone to create records for discovered NICs. The tags imported by this will be viewable in your DNS zone.
- Add the Extensible Attribute to descendant objects: You can use this to add EAs to objects such as subnets discovered from Azure (not possible to tag in Azure). Select Enable Inheritance on the Additional Properties tab when creating or editing your EA. Limit inheritance to specific objects by adding them to the RESTRICT TO SPECIFIC OBJECT TYPES table on the same tab.
- Create Smart Folders based on tags: Go to the Smart Folders tab in grid manager. Click on create and build your smart folder using filters similar to those discussed above.
Importing resource tags from Azure and AWS into your Infoblox grid provides new ways to filter your IPAM data. The extensible attributes which hold this tag metadata can be used to create filters and Smart Folders to organize views of your IPAM data. This is especially useful in hybrid and multi-cloud environments where there are many networks and things can change quickly.

