Reprinted with permission by original author and Infoblox community member Chris Greene
We use Infoblox for DNS management in our private cloud environment, and as part of the provisioning process we add a new DNS entry for the VM, but before we add a new DNS entry we want to make sure one doesn’t already exist. In our dev/test environment I was using the vRealize Orchestrator (vRO) SSH plug-in to run the nslookup command on the vRO server, parse the result and determine if a DNS entry existed. In our production environment I wasn’t able to do this so I decided to look into using the vRO HTTP-REST plug-in. We are using an older version of the Infoblox plug-in so it’s possible that newer versions have this functionality built-in.
Even if you’re not using Infoblox in your environment, this example will show you how easy it is to use the vRO HTTP-REST plug-in. Using vRO context menu actions in vCenter, you could also run a workflow that extracts IPs off of VMs in vCenter and registers them with Infoblox.
The below actually looks like a lot more work than it is. Since I already knew how to get results from Infoblox using curl, it took about 10 minutes to do the same in vRO.
Performing an Infoblox REST API call with curl
In the past I found out how to use the curl command to make REST API calls to perform options on Infoblox. Looking up an IP address is straightforward:
curl -k -u user
ass -X GET https://192.168.1.10/wapi/v1.0/record:host?ipv4addr=192.168.1.20
Let’s break this down:
- -k is insecure mode. This ignores self-signed certificates.
- -u user
 ass are the credentials.
 - -X is the type of HTTP request.
- https://192.168.1.10 is the Infoblox host.
- record:host specifies that we are looking up a host record.
- The IP at the end is the IP was are looking up.
This command results in:
|
1
2
3
4
5
6
7
8
9
10
11
12
13
14
15
16
|
[ { "_ref": "record:host/ZG5zLmhvc3QkLl9kZWZhdWx0LmNvbS5zZWFnYXRlLm9rbGEuY2xkLmNsb3VkbGcwMTYwNTA:superserver.vmware.local/Internal%20seagate", "ipv4addrs": [ { "_ref": "record:host_ipv4addr/ZG5zLmhvc3RfYWRkcmVzcyQuX2RlZmF1bHQuY29tLnNlYWdhdGUub2tsYS5jbGQuY2xvdWRsZzAxNjA1MC4xMC40OC4xNi41MC4:192.168.1.20/superserver.vmware.local/Internal%20seagate", "configure_for_dhcp": true, "host": "superserver.vmware.local", "ipv4addr": "192.168.1.20" } ], "name": "superserver.vmware.local", "view": "Internal" }] |
Now let’s create a vRO workflow to do the same thing as the curl command.
The steps we need to do are:
- Create a REST host.
- Create a REST operation.
- Testing the operation by invoking it.
- Creating a new workflow based off of the host and operation.
- Modifying the new workflow to add extra functionality that we need.
- Run the new workflow and validate it returns the expected result.
Add a REST host
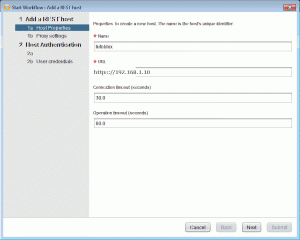
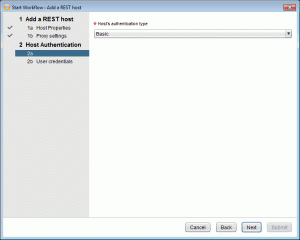
In the vRO client, go to Library > HTTP-REST > Configuration and run the “Add a REST host” workflow
Add a REST Operation
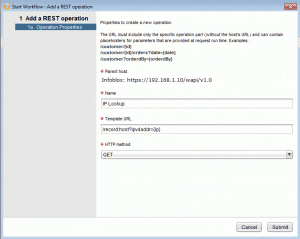
We need to create a REST operation that reproduces what we did with the curl command:
curl -k -u user
ass -X GET https://192.168.1.10/wapi/v1.0/record:host?ipv4addr=192.168.1.20
Our HTTP-REST host is “https://192.168.1.10/wapi/v1.0” and the template URL will be “record:host?ipv4addr={ip}” where {ip} is the name of the IP parameter that we pass in.
In the vRO client, go to Library > HTTP-REST > Configuration and run the “Add a REST Operation” workflow.
Invoke a REST Operation
Let’s test out our newly defined REST Operation.
In the vRO client, go to Library > HTTP-REST and run the “Invoke a REST Operation” workflow.
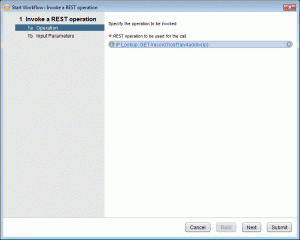
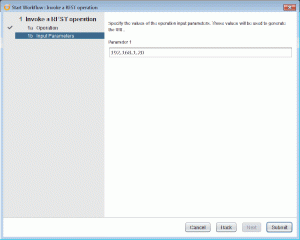
The result is:
|
1
2
3
4
5
6
7
8
9
10
11
12
13
14
15
16
17
18
19
20
21
22
|
[2015-04-16 17:14:10.013] [I] Request: DynamicWrapper (Instance) : [RESTRequest]-[class com.vmware.o11n.plugin.rest.Request] -- VALUE : com.vmware.o11n.plugin.rest.Request@7a3c931b[2015-04-16 17:14:10.014] [I] Request URL: https://192.168.1.10/wapi/v1.0/record:host?ipv4addr=192.168.1.20[2015-04-16 17:14:13.341] [I] Response: DynamicWrapper (Instance) : [RESTResponse]-[class com.vmware.o11n.plugin.rest.Response] -- VALUE : com.vmware.o11n.plugin.rest.Response@6b3fbd4e[2015-04-16 17:14:13.341] [I] Status code: 200[2015-04-16 17:14:13.341] [I] Content as string:[{"_ref": "record:host/ZG5zLmhvc3QkLl9kZWZhdWx0LmNvbS5zZWFnYXRlLm9rbGEuY2xkLmNsb3VkbGcwMTYwNTA:superserver.vmware.local/Internal","ipv4addrs": [{"_ref": "record:host_ipv4addr/ZG5zLmhvc3RfYWRkcmVzcyQuX2RlZmF1bHQuY29tLnNlYWdhdGUub2tsYS5jbGQuY2xvdWRsZzAxNjA1MC4xMC40OC4xNi41MC4:192.168.1.20/superserver.vmware.local.com/Internal","configure_for_dhcp": true,"host": "superserver.vmware.local","ipv4addr": "192.168.1.20"}],"name": "superserver.vmware.local","view": "Internal"}] |
We can see that the status code is 200, which means OK, and you may recognize the rest as being in the json format. I’ll discuss this more later.
Create a new workflow off of our REST operation
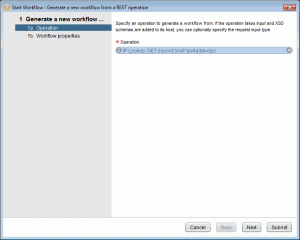
Now that we know that our REST operation works, we want to create a workflow off of it so that we can modify it for our own needs.
In the vRO client, go to Library > HTTP-REST and run the “Generate a new workflow from a REST operation” worfklow.
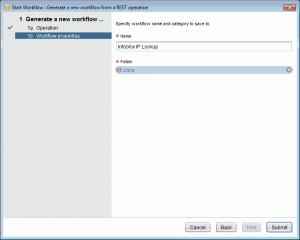
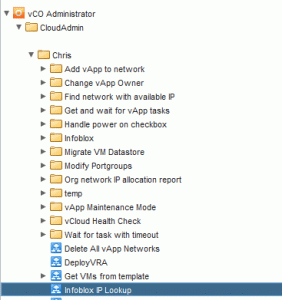
Modifying our new workflow
Now we need to modify our workflow to make it return the fully qualified domain name (FQDN) of the IP address that we searched for.
Edit the “Infoblox IP Lookup” workflow.
- Select the Outputs tab
- Select Add Parameter
Select arg_out_0 to rename it.
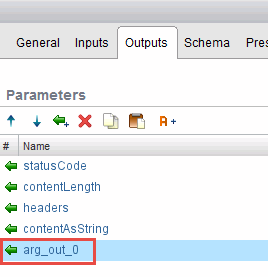
Name it fqdn

It should now look like:

Remember when we invoked the REST operation to test it and it returned json as output (well, technically it returns a string that we convert to json)? Now we need to parse the json results and get the info we need. Since vRO uses Javascript as it’s scripting language, this is really easy to do.
Let’s add the additional code we need.
- Select the Schema tab.
- Select the Scripting object.
- Select the Scripting tab.
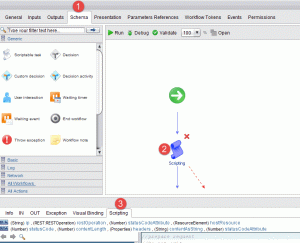
Go to the bottom and add the following code:
|
1
2
3
4
5
6
7
8
9
10
11
12
13
14
15
16
17
18
|
// Convert the results from Infoblox into a json object. var jsonContent = JSON.parse(contentAsString)// The json object will be an array. Let's print out how many results we found. It should only be one. System.log("results: " + jsonContent.length)// If our status code is 200 and we received exactly one result, access the name key, which contains our DNS name// and then set the fqdn variable to the DNS name. The fqdn variable will be returned to the calling workflow.if (statusCode == '200') { if (jsonContent.length == 1) { fqdn = jsonContent[0].name System.log("IP resolved to " + fqdn); } else { fqdn = '' System.log("IP doesn't exist in infoblox" + jsonContent.length) }} |
It should look like this:
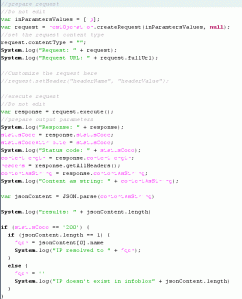
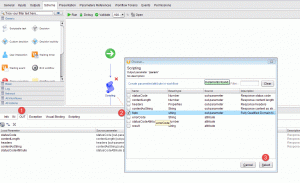
Configure the output of the workflow to return the fqdn variable.
- Select the Out tab.
- Select the fqdn variable.
- Select finish.
Run the Infoblox IP Lookup workflow and enter an IP you want to lookup:

The output should be the same as when you invoked the REST operation, but now at the end you should see:
[2015-04-17 12:02:41.476] [I] IP resolved to superserver.vmware.local.
You can then use this result however you want. In our case, we either keep the existing entry or delete it and create a new one depending on if it matches the new VM we are creating.


