Organizations are adopting initiatives based on virtualization, cloud and hyper-converged infrastructure. To do so, they need higher levels of agility and flexibility to fulfill the promise of greater efficiency. Infoblox NIOS technology helps solve this problem by accelerating the deployment and management of critical network services in virtualized environments. The release of NIOS 8.5 adds vNIOS for Nutanix Acropolis Hypervisor (AHV) to Infoblox’s stable of vNIOS solutions for private cloud platforms such as VMware and OpenStack.
Prerequisites
- NIOS 8.5 qcow2 image
- Nutanix AHV version 5.11
Supported Platforms
The table below shows the list of supported models in the Nutanix environment.
| Trinzic Series Virtual Appliances | Overall Disk (GB) | Number of vCPUs | Number of CPU Cores | Memory Allocation | Supported as Grid Master and Grid Master Candidate |
| IB-V815 | 250 | 1 | 2 | 16GB | Yes |
| IB-V825 | 250 | 1 | 2 | 16GB | Yes |
| IB-V1415 | 250 | 1 | 4 | 32GB | Yes |
| IB-V1425 | 250 | 1 | 4 | 32GB | Yes |
| IB-V2215 | 250 | 1 | 8 | 64GB | Yes |
| IB-V2225 | 250 | 1 | 8 | 64GB | Yes |
| IB-V5005 | User defined reporting storage | 1 | User defined | User defined | No |
| Cloud Platform Virtual Appliances | Overall Disk (GB) | Number of vCPUs | Number of CPU Cores | Memory Allocation | Supported as Grid Master and Grid Master Candidate |
| CP-V805 | 250 | 1 | 2 | 16GB | No |
| CP-V1405 | 250 | 1 | 4 | 32GB | No |
| CP-V2205 | 250 | 1 | 8 | 64GB | No |
| Network Insight Virtual Appliances | Overall Disk (GB) | Number of vCPUs | Number of CPU Cores | Memory Allocation | Supported as Grid Master and Grid Master Candidate |
| ND-V1405 | 250 | 1 | 4 | 30GB | No |
Instructions
- Log into the Infoblox Support site to download the NIOS image.
- Select the vNIOS for KVM section to download the qcow2 image.
- Log into the Nutanix Prism GUI.
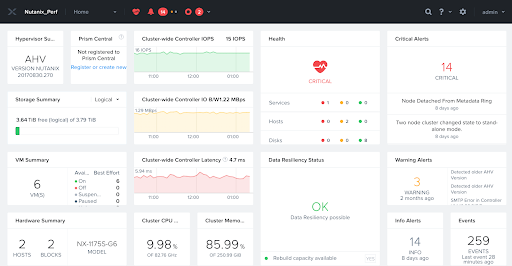
- From the drop-down menu, select the Settings selection and then select Image Configuration.
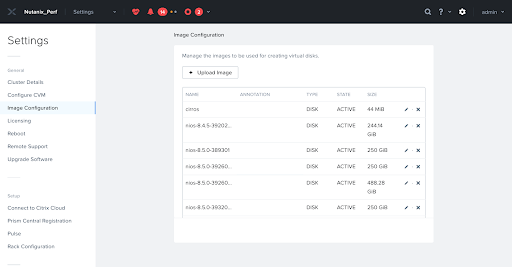
- Click on ‘Upload Image’. Input a name, description (ie annotation), image type of disk, storage container. Choose ‘Upload a File’ and upload the file from step 2. Click Save.
- Navigate to VM from the Prism GUI.
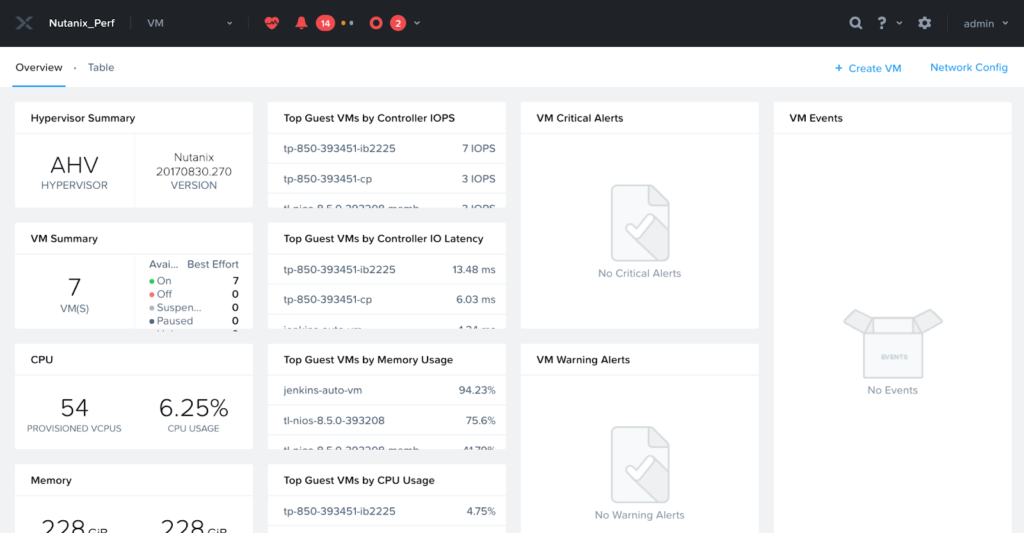
- Click on Create VM. Enter name, description, timezone, vCPU, cores per vCPU.
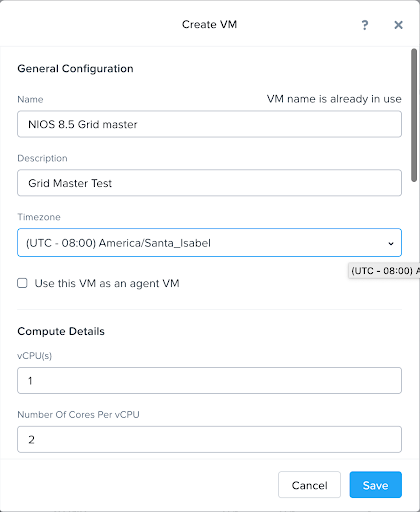
- Scroll down and enter memory.

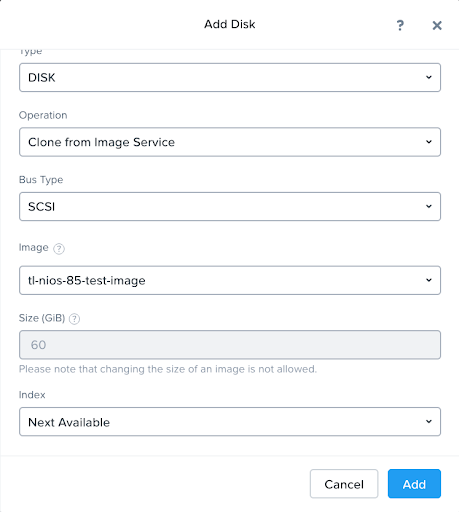
- Add a disk. Type is disk. From the Operation drop-down list, select Clone from Image Service. From the Bus Type drop-down list, select SCSI. From the Image drop-down list, select the image that you uploaded when deploying the virtual appliance. Click Add.
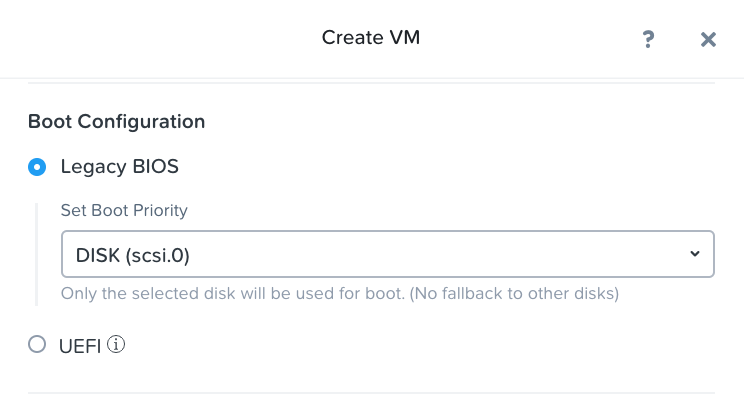
- Select Legacy BIOS and then set the boot priority.
- Add the NICs (network interface cards). You can add up to 4 NICs. The NICs represent the following VLANs in this order:
- NIC 1: MGMT
- NIC 2: LAN1
- NIC 3: HA
- NIC 4: LAN2
- You must assign the VLANs in this order. Click Add.
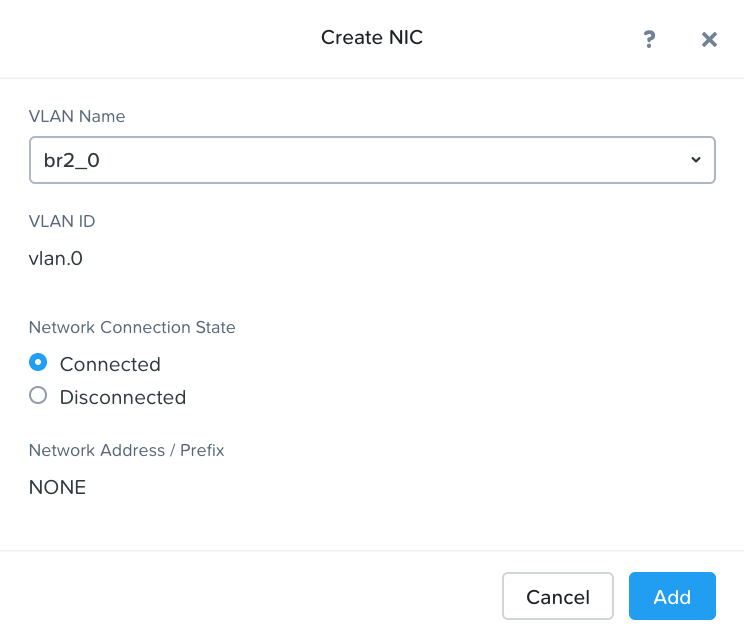
- Repeat this command for the MGMT and LAN1 interfaces.
- Start a command prompt and run the following commands from the Nutanix controller VM:
- Run the acli vm.list command and note the VM name and VM user ID.
- If you have enabled the custom script, create a serial port by using the following command:
acli vm.serial_port_create <VM name> index=0 type=kServer - For the VM to function properly, turn off the VM branding using the following command:
acli vm.update <VM uuid> disable_branding=true.
- Click Save.
- In the Prism web console, select the new VM in the VM table, and then click the Power On button to start the VM.
- If there are no Nutanix errors, refresh the screen and then launch the console.
Configuration of Grid Master and Grid Members
- In the console, you will need to do the following:
- Login at the prompt. The default username is admin and the default password is infoblox.
- Execute command set temp_license to set the model number using the NIOS license selection. Once this is done the VM will reboot.
- Execute command set temp_license to set DNSOne license. This selection sets the Grid Master for DNS, DHCP, and Grid.
- Execute command set network to set the IP address of the Grid Master or Grid Member. Once this is done, the VM will reboot.
- From your workstation, try to ping the VM that was created. If successful, then you use your browser to connect to the grid master. The syntax is https://<IP address>.
- Refer to the NIOS Administrators Guide for information on grid deployment and feature integrations.


