Infoblox has dominated the DDI market space for more than a decade and It’s no surprise that Infoblox supports multi-cloud deployments with integrations from Public Cloud Market leaders. Let’s look at one of many integrations that will bring security right at the top of the table which highlights about Azure Active Directory Single Sign on experience with Infoblox DDI. Infoblox offers robust DNS solutions, including support for DNSSEC to ensure secure and authenticated DNS traffic.
Note : The SAML Single-Sign-on steps discussed in this blog can be used as a reference for any other 3rd party IDP being integrated with Infoblox vNIOS
Azure is Microsoft’s cloud computing offering. Azure Active Directory (Azure AD) is the cloud identity and access management solution for managing users in the Azure Cloud. IT admins use Azure AD to authenticate access to Azure, Office 365™, and a group of other Enterprise applications through limited SAML single sign-on (SSO).
The Benchmark factor why Azure AD is growing in Enterprise space is Authentication protocols used in Azure AD are cloud-based authentication protocols like OAuth2, SAML, and WS-Security for user authentication while its predecessor Windows Active Directory (AD) still uses Kerberos and NTLM which are legacy protocols.
A few Prerequisites to set up SSO for Infoblox vNIOS in your Azure AD tenant are:
- An Azure account with an active subscription
- One of the following roles: Global Administrator, Cloud Application Administrator, Application Administrator, or owner of the service principal.
Let’s talk about configuration steps to get Azure AD authentication working against Infoblox vNIOS or any other Enterprise application that support SAML.
1. Registering on-prem Infoblox vNIOS as Enterprise application on Azure AD
In this step, Navigate to Azure active directory portal and create an Enterprise application in the category of non-gallery application as below.


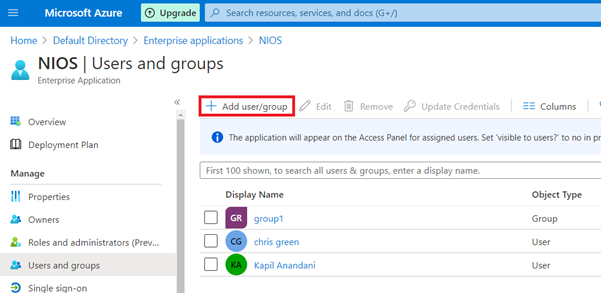
2. Add Users to your Application.
Create or select users/groups as required to interact with Infoblox’s interface as single-sign-on user
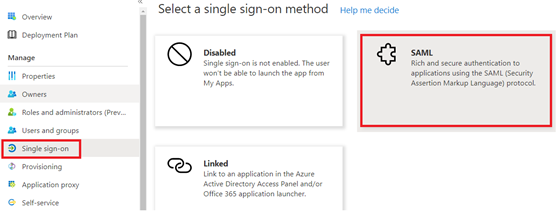
3. SAML configuration on Azure side
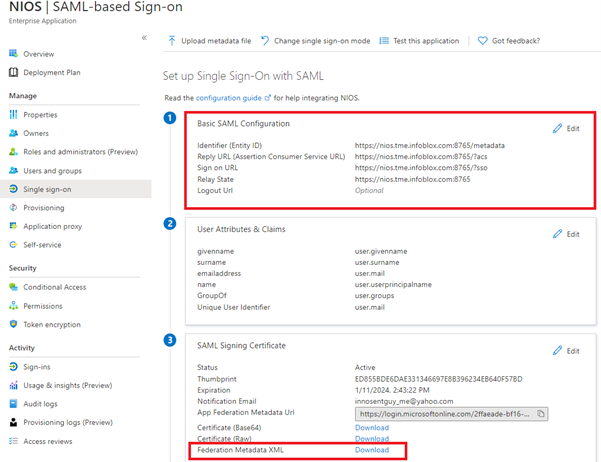
Microsoft Azure now comes up with simplified view to ease configuration experience to set up SAML 2.0. Add the required information for your Infoblox vNIOS in “Basic SAML Configuration” and all you need is “Federation Metadata XML” from “SAML Signing Certificate” as highlighted below which will be used to configure Infoblox vNIOS.
4. SAML configuration on Infoblox side
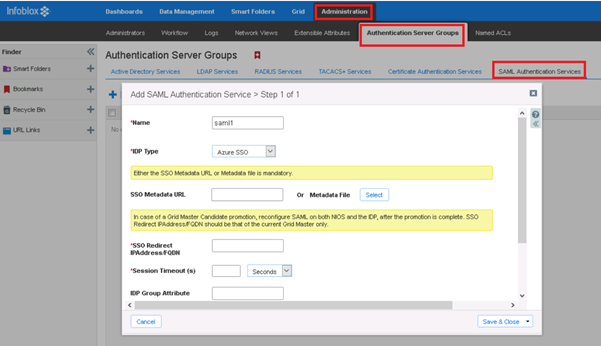
The next step is to Add Azure AD to your Infoblox vNIOS, which also supports domain name system security extensions DNSSEC for enhanced authentication. Navigate to the path highlighted below. Add a new “SAML Authentication Service” and upload the Federation data extracted from Azure AD SAML configuration.
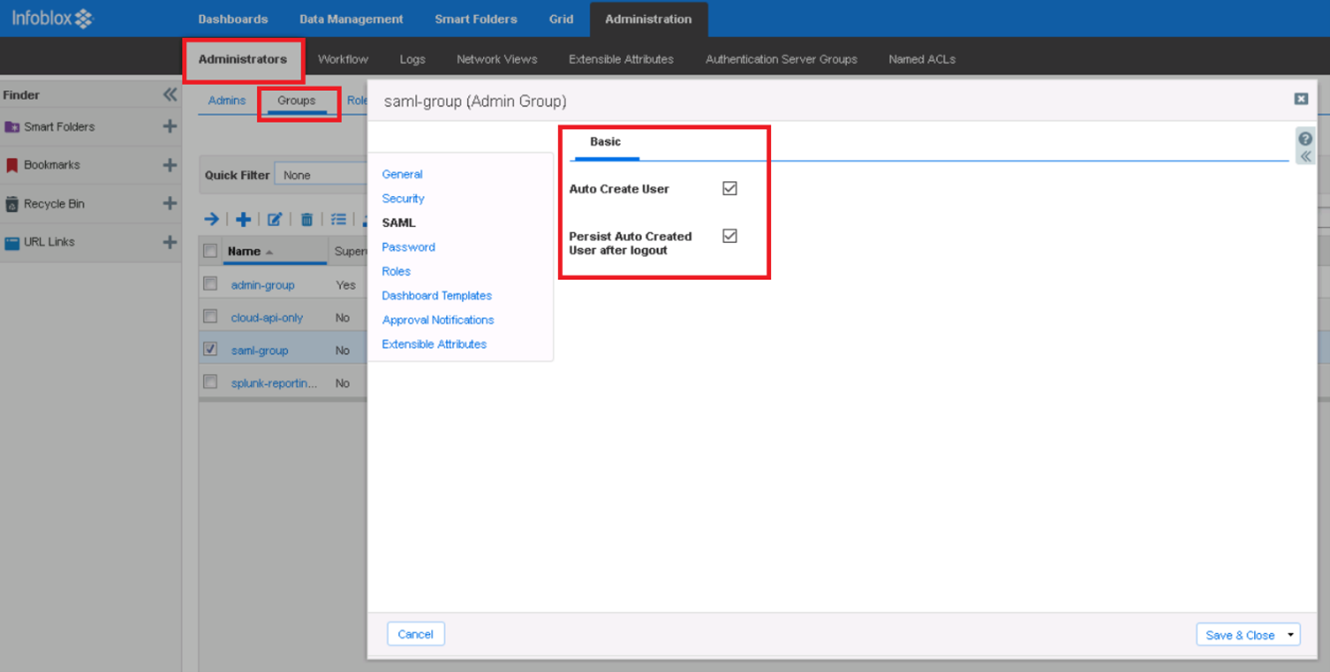
Infoblox supports Just-in-time user provisioning when users are authenticated using 3rd party IDP. To enable this simply edit “saml-group” properties as highlighted below.
5. Test SSO Integration
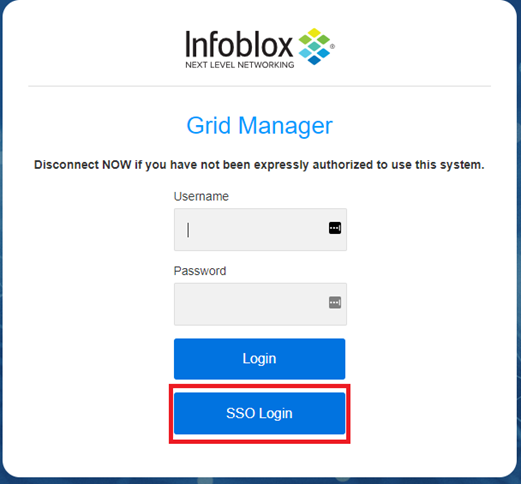
Now at this point we are ready to test the single sign on feature. Navigate to your Infoblox vNIOS and click on “Single Sign On” followed by your Microsoft credentials.
For more information on Infoblox’s latest integrations please visit us at https://community.infoblox.com/

